Saturday, 16 October 2010

kern paillard yvar f1.9 13mm. really nice little lens. the orange dots move in and out as the aperture is changed to indicate the depth of field. the focus ring was stuck but its loosened up a good bit now.

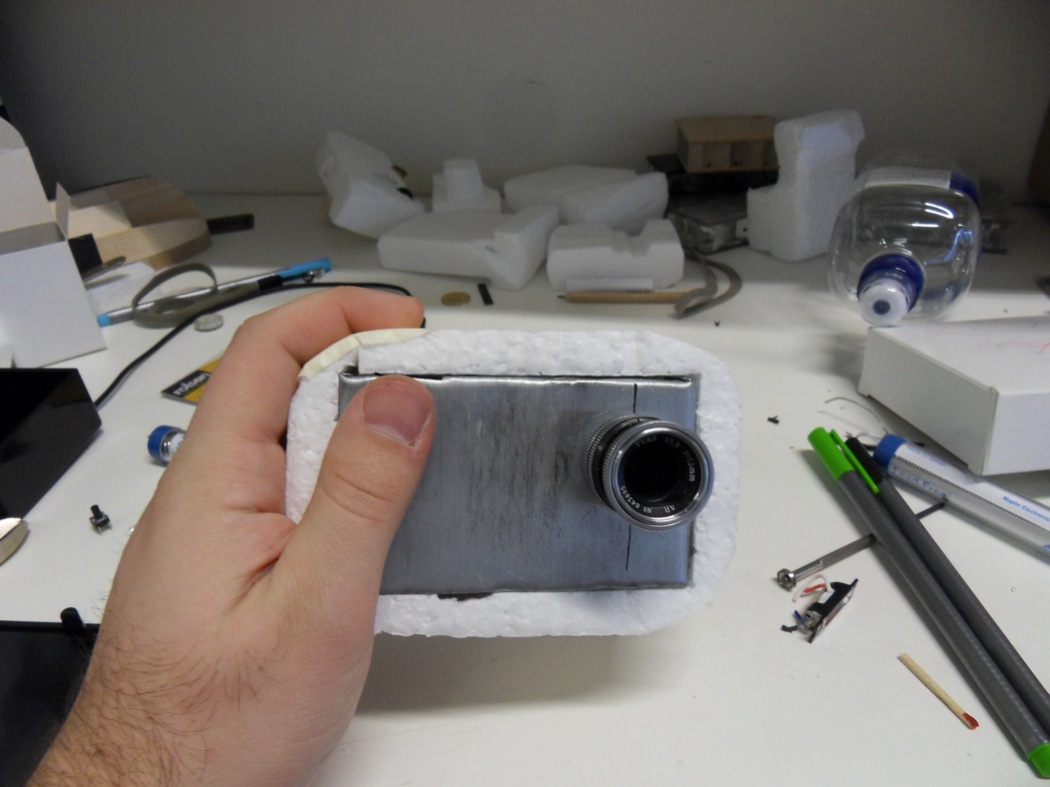
got it on the "new" camera. the batteries died but i did get it to focus before they did so. the field of view was good. could be on to a winning combination here. the ring of aluminium that was the exposure dial from the old praktica makes the perfect spacer.

quick  mock up.

Friday, 15 October 2010

this the wooden form with the lens and shutter in place. with any luck i will cast this in pewter on monday. this is just for the appearance prototype. i think it will have to be a bit bigger if i want to make it a working prototype which might be the next step. 

Thursday, 14 October 2010

getting read to cast. some pewter i already cast and a brand new ingot.

there was some bubbling caused by a piece of wood that was in the plaster. it lest this weird crystalline lump on top.

here is how it looked after breaking the mould. it had a nice light gold kind of colour.

this is how it looked after the first round on the sander. there are some imperfections here and there but it is not bad considering the rush in which i made it.

here it is with the wooden one just before it gets a final polish.

the imperfections really show up once it is polished. the pewter has a really nice feel to it.

bit of delicate filing to fit the lens. i could not get a thread cutter this big so i just made the hole slightly smaller than the  thread so it just bites a bit.

and thats basically it.

Wednesday, 13 October 2010

trying to figure out a way to cut this shape so it could be vac-formed. this means i need to find a way to half it so i can lay down the halves and have no undercuts. the shape needs some modification to make this possible. im not going to worry about this too much as this shape will likely change anyway before i need to start building it.

template for on of the curved sides. i modelled the shape in rhino and unrolled the surfaces. this was to try making it from sheet materials. i also thought it would be easy enough to make it from sheet wax and then lost wax it into pewter.

started stripping down the camera i found in the skip. pretty simple inside. the power switch, shutter release, flash, battery box and mode dial could all be easily relocated with longer wires as they are all off the main circuit board. i have already determined the distance the kern-paillard lens needs to be from the sensor to make the markings on the lens accurate. this is essential as i cant see any way other than the lcd to see if the camera is in focus. i think i want to leave out the lcd. luckily the lens has a nice depth of field indication.

Tuesday, 12 October 2010

i am finally getting around to building a working prototype with the cine lens. i have taken the flash, capacitor and battery box off the front of the circuit board. this is because the lens need to get quite close to the sensor and moving the whole board forward is easier than relocating the sensor.

this frame will hold the lens in relation to the circuit board. i will then encase the whole thing in a vac-formed plastic shell. the threads on the lens mount dont go right up to the flange and so dont grip the thin metal. on the left you can see two plastic nuts to thread on from behind.

as you can see i went for the thinner, red nut. i just drilled the hole slightly too small and  worked it on slowly.

the lens held securely in place.


here you can see the electronics hels in the frame. the screws are in slots rather than holes so i can adjust the flange distance to get it just right. i intend to place the camera a measured distance from an object and set the lens to that distance. then i will move the sensor in relation to the lens until the object is perfectly focused.

another view. you can see that the lens is miles over to the left and quite high. that is the down side of using donor cameras. but building from scratch just wont happen in my timeframe.

Monday, 11 October 2010

here are three shots of a foam prototype. it has some features that im pretty sure i want to include in the final piece.


here you can see the viewfinder and how it intersects with the body rather than being fully embedded in it. this is to provide a visual indication of the cameras direction when shooting from the hip. the coloured bit it a switch for white balance. it has three position. daylight in the middle with a blue and orange filter either side.

here is a view through the lens. i think a proper optical viewfinder is best but it means you have to keep the taking the camera away from your eye to set the focus and aperture. what i have done is used a fisheye viewfinder  to enable the user to see the lens settings in the bottom of the viewfinder.

here you can see the thumbwheel. i have shaped the camera son it can be held securely in one hand and without the thumb. i think this is a good way of controlling the shutter speed. i thought perhaps a small window on top of the camera and shutter speeds printed on top of the wheel.

Sunday, 10 October 2010

foam model ready to be dipped in paint.  white model white paint but it should improve the texture and stop the polystyrene flaking all over the place.

another foam model. here you can see the raised viewfinder and angled cutaway for the shutter release. the near bottom corner is rounded to make using the lens easier.

the two models after a couple of dips in the paint. its quite a nice texture to hold.

some card shoe inserts i saw outside a shop on the way to college. going to try moulding a camera from it.

got some marker on it.

same one again. the join line around the camera is so heavy because i intend to have the internal chassis show through where the two halves of the camera meet.

soaking some of the shoe card in water. in the left are two halves of a foam camera to mould it onto.

went alright. ill see on monday when its dry. hard to work it without it just falling apart.

shot of the back of the camera. on the right is the thumbwheel for shutter speed. in the middle is a slide for iso. havent fully worked this out yet but if iso is just ramping up the gain the could that be controlled by a slide potentiometer? next is the white balance. daylight in the middle and one filter each side.

Saturday, 9 October 2010


this is the guts of the working prototype. hooked up as a webcam to set the flange distance.

shutter in red and power in black.

one option is to encase it in foam like this. feels nice because its a bit squishy.

in the end this is what i went with. i intent to give this to someone to test out. the black box and red button are clearly off the shelf items and so dont provoke any discussion about form. this should focus any dialogue on the function which is the focus of the prototype.

just enough space to fit the small floating pcb and the switches.

what an utter mess. im not great at soldering and this is very fiddly. this is so i can use my own switches for power and shutter move the mode dial to a part of the box with more space.

all in. what a faff. couple of late ones in the studio but it does take photos.

Friday, 8 October 2010

first set of pictures taken with the camera in the project.


lights taken from the bus. dont know if the pulse effect is from the light of the camera.

my face. this is not as bad as it looks. it was taken on a night bus the only light os the reading light from the people across the aisle. so its a terrible photo but hard conditions for any camera.

dodgy shot of the studio. not good but it does show that the field of view is much improved over earlier versions.

reubens daffodils.

Thursday, 7 October 2010

here are a few shots from skipcam