Saturday, 30 October 2010

the frankencam project is about investigating the positives and negatives of digital, film, automatic and manual cameras. the aim is to find out how people feel about cameras and what they offer. at the moment my main research method is building prototypes and getting feedback on them. i feel that cameras would be different if digital has made it before automatic. the manual digital market never got a chance. i want to explore that market.
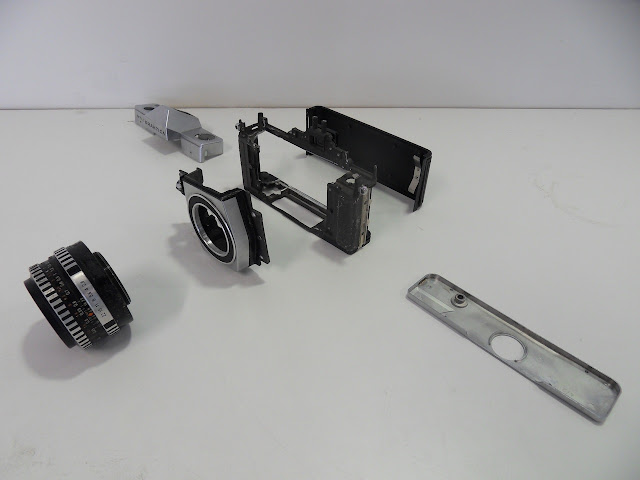
praktica mtl5b. it took about 4 hours to remove all of the mechanisms from inside to make space for the digital workings which i am going to get from some broken cameras. should be cheap enough on ebay.

timer release clockwork. there are so many amazing pieces of metal inside this camera. i really felt sorry to be taking it all apart. hopefully worth it.

the main chassis of the camera is a fantastically complex bit of casting and didn't leave much useable space even after removing all the mechanisms. i had to go a step further and cut out lots of aluminium. thanks to robbie for the mandrel

the front of the chassis after removing the frame to which the mirror and prism was attached to. the frame protruded into the main chassis almost as far back as the shutter so it had to go.

quick test fit of cheap digital camera inside slr  body.  ironically  it  too is a "praktica". it fits in fine although it is such a bad camera that i will need to upgrade it asap. my desk is always that messy.

using macam to see what the sensor sees. this camera uses AAA cells and its quite annoying to keep replacing them. i use macam when im in the house so i can run the camera of the usb cable.

got a new camera to use today. thanks to a.j. johnstone who kindly gave me two older canon powershots. this one is working apart from the lcd backlight. the (sony) lcd is working fine. they have no onboard memory and i have no compact flash so i need to find one about the place or have another look at how to use this camera through the laptop.
trying to separate the sensor from the lens. i have left the focusing lens in front of the sensor for now to protect it and incase in comes in handle when trying to match the sensor with the new lens. 

Friday, 29 October 2010

praktica main chassis components. this is what im using after removing the mechanisms and cutting out the metal taking up space inside.
the powershot after i removed all the bits i want to transplant into the praktica body.

all of the bits from the powershot that i want to use in the finished camera.  i dont need the shooting modes dial but it has the sliding contacts under it so ill need to re-attach it at some point.


the parts of both cameras arranged in a rough semblance of where they will end up. i think the screen will be hidden and the praktica door can be opened to access settings etc. for normal shooting i think the screen can go.

same as above but from the front. 

Thursday, 28 October 2010

wordle cloud. this is great for getting key info into an easy to access format. i put in six articles im reading and got this.  great for a quick glance.

Wednesday, 27 October 2010

camera prototype made by andrew shaw. i liked it so much i think that its going to be my new aesthetic for a while.

another view of andrews camera.

made a foam copy of andrews camera to figure out the sizes to fit my phone inside.

view of shutter release [works] and the slot for the phone.

shot taken by foamcam of andrew.

shot of me through the screw-on fisheye visible in the above photos of the foamcam.

shot of sam without fisheye.

had great fun about the studio with the foam cam so i moved it up a level.

about an hour in the workshop and the woodencam is basically there. just morticed a deep slot for the phone and a hole in the front for the lens surround.

taken with woodencam on the bus on my way home.

Tuesday, 26 October 2010

woodenbox with a fistful of photos

made another woodencam. this one takes the nasty praktica and has a manual focus and aperture.


both woodencams. i sanded the first on a wee bit so it fits in the hand a bit better. first on is a little rough till i get it going then il clean it up a bit. i made a few lens mounts so i can adjust the distance from the lens to sensor.


Monday, 25 October 2010

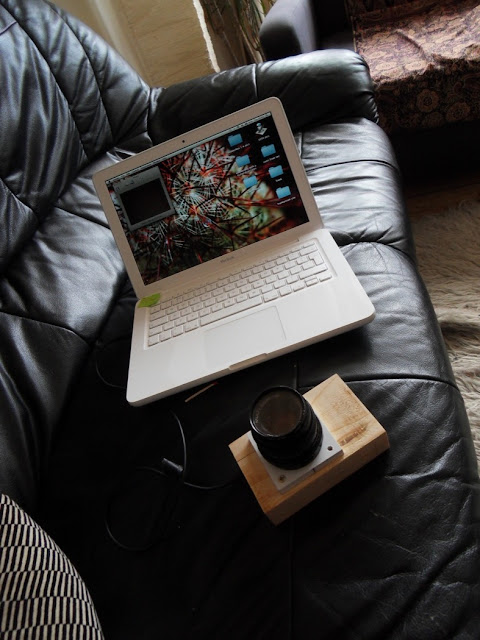
woodenbox connected to macam. atm the praktica digital camera is to only one i have that i can connect to my laptop like this so the picture quality is a bit dire. i need to get a powershot to connect like this or buy a compact flash card if i want better quality. this works for now. 

you can see here that i have added a wooden spacer behind the lens mount. its pretty close  to the right distance.  things come into focus pretty much corresponding with the number printed on the lens.

shot of heinz bottle taken with woodenbox and macam. the usb output is quite low res so this is as big as it gets. this shot was taken from about four feet away so you can see the huge crop factor.

sloe gin from across the room.

now thats a screenshot
fistful of photos taken with frankencam ver.woodenbox. at the moment im involved in some pretty bothersome trial and error trying to alter the lens to reduce the crop factor. if you have any expertise in this area please send me an email or leave a comment. thanks


Sunday, 24 October 2010

woodenbox while lining up lens and adjusting focal length. lens mount is ldpe with a 38mm hole. the lens is m39 thread and the plastic has a bit of give so its a really snug fit.

rear view of wooden box. had to hack to the screen hole cos the workshop was shut and it was too hard to guess the focus as the numbers on the lens are no longer quite valid.

on the left is the one which takes the cheap praktica camera. the other takes my phone.

four views of woodenbox after a short encounter with the disc sander. this is actually a really nice size in the hand. the great thing about using wood is the body is the flexibility it allows.  and its really quick. it only takes about half an hour to rough out a body and drill all the relevant holes.

Saturday, 23 October 2010

event at eca. students from across all design departments get one square metre to show their work and hopefully encourage colaboration.

woodenbox at above event. no real updates at the moment. been modifying the lens to make it match  the sensor. tried to change lens elements. no luck so far. almost any change i make results in some form of macro lens.  if anyone knows any way to do this i really need help with it. 
what a mess. i have been swapping lens elements. i have a fisheye, the lens elements from a 50mm  and the small glass elements from a canon powershot. so far i have spent about a week just swapping them about. i think that as of last night my understanding of how these elements make work together to make a lens has increased dramatically to about 1 %.

here is one combo that didnt work.

this one was a bit of a milestone. the first two elements of the 50mm lens have been reversed and i added the second last element from the powershot lens. it would not quite focus but the field of view was about the same as a 35/40mm lens on a 35mm camera.

this is essentially the same setup as above except the two pieces of glass from the 50mm are now the right way around.  field of view reduced but closer to focusing. 
almost any change i make to the lens results in a macro lens. here are some pixels.

here are slightly more pixels show that the field of view is increasing as the night wears on.

whoa its almost a fisheye. 

there it is.  a large step backwards.

now thats more like it. still cant focus though.